Categories
Art

Generative Interactive Sound Art Installation

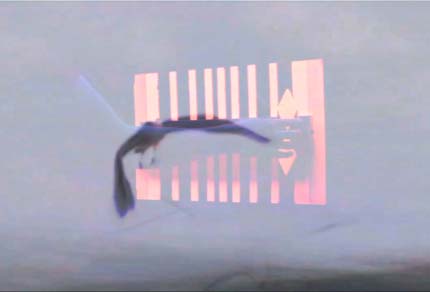
AMBIENT² translates the soundscape of Harakka Island in Helsinki into music through a computer-driven generative process. We are born into a familiar sound environment that becomes our baseline, making everything else seem strange or peculiar. This project is about reinterpretation—by rendering the same soundscape as music, it reveals unexpected and uncanny elements. Video of the interactive sound installation.

Ambient^2 Generatiivinen ääni-installaatio

The music created by AMBIENT² does not conform to any traditional note system. Instead, it reconstructs the source material’s frequencies using synthetic instruments in a spectral musical framework. The result is a composition that never exactly repeats itself; the observed environment acts as the composer, generating its own unique tonal system. This music is not random but governed by its inherent rules.

Rooted in ambient aesthetics, the piece blurs the boundaries between ambient sound and ambient music, seamlessly merging the musical space with the surrounding world.

AMBIENT² was featured at the La-Bas Biennale 2012 and exhibited at the Sound Art Gallery Akusmata.

Categories
Web

Visually Rich Flash Quiz About Ice Hockey Team Players

Kettupeli was developed for media company Länsi-Suomi, specifically for their online outlet Raumalainen.fi. Centered on players from the local ice hockey team Rauman Lukko, the game is based on questionnaires the players completed about their daily routines leading up to a match. These responses were transformed into an interactive quiz, offering fans a more personal glimpse into the lives of the athletes and fostering a closer connection between players and audience.

Technically, the game was implemented as a Flash movie with a strong emphasis on modular Actionscript code, prioritizing structure and maintainability over pure timeline animation.


Categories
Web

Images Added to WordPress Tag Cloud with jQuery Styling

This simple jQuery script adds images to individual tags in the WordPress tag cloud (wp_tag_cloud) and allows you to style the cloud without modifying WordPress core functions. The image sizes correspond to the font sizes assigned by the tag cloud function.

jQuery(function() {
    var imagesize;
    var alttxt;
    var linkhref;

    jQuery('a[class^="tag-link-"]').each(function() {
        imagesize = jQuery(this).css('font-size');
        alttxt = jQuery(this).text();
        linkhref = jQuery(this).attr('href');

        jQuery(this).before(
            '<a title="tag: ' +alttxt+ '" href="' +linkhref+ '">
             <img src="path/to/your/image" class="tagcloudimage"
             style="width:'+imagesize+';height:'+imagesize+';"
             alt="'+alttxt+' icon" /></a>'
        );
    });
});

The script starts by defining variables, then targets tag cloud links with class names beginning with tag-link- (followed by the tag ID). Using jQuery’s .each() method, it iterates over each matched element.

For each tag link, the script extracts the font size, visible link text, and URL from the href attribute. It then injects new HTML before the link—creating an image link populated with these values.

This function can be easily extended to customize the tag cloud’s appearance further—for example, by adjusting text color based on size. For best results, place the script at the footer of your page (after the tag cloud).

Categories
Web

Custom Random Gallery Script for WordPress with jQuery Layout Integration

You might expect a more complex project from the title, but this is actually a simple and straightforward implementation. While renovating a WordPress-based website, I wanted to create a clean visual effect using the default gallery feature. I initially tested with five images, which automatically arranged themselves into an unintended two-row “inverted staircase” pattern — three images on the first row and two on the second. This accident sparked the idea of completing the staircase with a third row containing a single image, with all images randomly selected from a larger pool.

However, the default WordPress gallery injects its own CSS and HTML wrappers, limiting customization. To remove the default styling, a function needs to be added to the theme’s functions.php file.

add_filter (
   'gallery_style', create_function (
      '$a',
      'return preg_replace("%<style type=\'text/css\'>(.*?)</style>%s", "", $a);'
   )
);

I’ve broken the code across multiple lines for readability, but it’s originally a one-liner and functions the same either way. To preserve the original gallery styling, you’ll need to add specific CSS rules from sivel.net to your style.css.

However, that alone isn’t sufficient. I needed full control over the HTML structure, so I had to build the gallery from scratch. This required creating a new page in WordPress containing the image gallery—this page serves as a hidden image source. It can be set to Private and excluded from navigation or visibility entirely.

To keep things brief, here’s the PHP code I used to extract the images and output the custom gallery layout.

<?php
 echo '<div class="gallery">';
 $images = get_children(array( 'post_type' => 'attachment',
                               'numberposts' => 6,
                               'orderby' => 'rand',
                               'post_status' => null,
                               'post_parent' => 104,
                               'post_mime_type' => 'image'
                            ));
 if ($images) {
    $k=1;
    foreach ( $images as $image ) {
       $img_title = $image->post_title;
       $img_url = wp_get_attachment_url($image->ID);
       $img_thumb = wp_get_attachment_thumb_url($image->ID);

       echo '<dl id="image_'.$k.'"><dt>';
       echo '<a href="'.$img_url.'"><img src="'.$img_thumb.
            '" alt="'.$img_title.'" /> </a>';
       echo '</dt></dl>';
       $k++;
    }
 }
 echo '</div>';
 ?>

This code fetches six random image attachments from post ID 104, which I use as the hidden gallery source page. It retrieves each image’s title, original URL, and thumbnail URL, storing them in variables. Place this code in the template .php file where you want the gallery to appear.

I use echo to output HTML tags matching the default WordPress gallery, inserting the variables accordingly. You can wrap this output with your preferred HTML tags as needed.

The variable $k is key—it assigns a unique ID to each image (e.g., id="image_01"), which is essential for the next step, where jQuery targets these IDs for layout styling. The following jQuery code should be added immediately after this PHP block.

<script>
jQuery(document).ready(function() {
    jQuery('#image_1,#image_2,#image_3').wrapAll('<div id="upperrow" />');
    jQuery('#image_4,#image_5').wrapAll('<div id="middlerow" />');
    jQuery('#image_6').wrapAll('<div id="bottomrow" />');
});
</script>

jQuery selects images by their unique IDs and wraps each in corresponding <div> elements. While this could theoretically be done with PHP, jQuery provides an easier, more direct solution.

Each row is styled with the same CSS rules: { float: left; clear: both; }.

By using loops and counters in the jQuery code, you can dynamically control the number of images and create large, randomized galleries or visual layouts with minimal effort.

Categories
Web

Creating a MySQL Database with PHP and Exporting It as CSV

Download the example package: php_mysql_csv_example.zip

This package provides a simple, modular intranet database example built with PHP and MySQL, designed for easy modification and learning. It includes CSV export functionality and is based on tutorials I’ve adapted and commented into a compact, practical form. While slightly over-modular, the code is intended as a set of reusable building blocks for your own projects.

The example is intended for local development environments such as MAMP (Mac), WAMP (Windows), or XAMPP (Linux). Make sure you have a MySQL user root with password root (commonly preconfigured). Edit the dbinfo.inc.php file to set database credentials (user, password, host, dbname, table), which are referenced throughout the code.

To get started:

  1. Open createdatabase.php in your browser to create the database and table.

  2. Then open index.php to access the basic interface.

Forms are used to submit data to PHP scripts, which build SQL queries accordingly. Sorting by column headers is also implemented.

Security considerations:

  • Protect sensitive files (like dbinfo.inc.php) using .htaccess and .htpasswd.

  • For public use, implement SQL injection protection — this example is intentionally left open for learning purposes.

Download: php_mysql_csv_example.zip